Migrate a Hyper-V VM restored using Rapid VM Restore to permanent storage
When you first use Rapid VM Restore to restore a Hyper-V VM, the VM is dependent on the Hyper-V Agent and vault, and is intended for temporary use.
To restore the VM permanently, use Portal to migrate the VM to a permanent storage location in the Hyper-V environment. You can migrate the VM to a location on the same volume selected for the Rapid VM Restore or to a different volume.
If the VM is powered on, you can continue to use the VM during the migration. After migration, the VM is independent from the Hyper-V Agent and vault.
If you cancel a migration before a VM is fully migrated to the permanent location, the restored VM remains in the Hyper-V environment and continues running using the Rapid VM Restore process. If you do not cancel the Rapid VM Restore process, you can try to migrate the VM again.
Notes:
-
We recommend using Portal to migrate VMs to permanent storage rather than using Hyper-V Manager. If you restore a VM using Rapid VM Restore and migrate it to a different host and storage using Hyper-V Manager, you will not be able to migrate the VM to permanent storage using Portal.
-
A Hyper-V VM restored using Rapid VM Restore cannot be backed up until it is migrated to permanent storage.
-
While a VM is being migrated, you cannot power on, power off, suspend or create a checkpoint for the VM using the Hyper-V Manager.
-
If high availability was enabled for a VM when it was backed up, high availability will be enabled for the restored VM after it is migrated to permanent storage. However, specific high availability settings (e.g., preferred owner, failover and failback settings) are not applied.
To migrate a Hyper-V VM restored Rapid VM Restore to permanent storage:
-
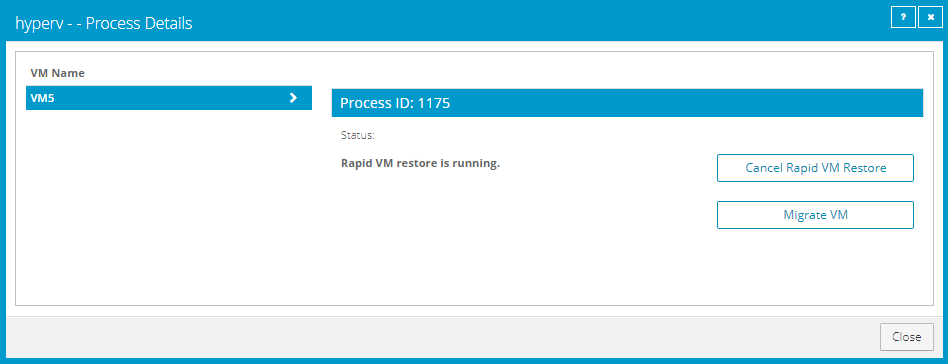
If the Process Details dialog box is not open for the Rapid VM Restore process, find the Hyper-V environment on the Computers page. On the Virtual Machines tab for the Hyper-V environment, click the Rapid VM Restore symbol beside the protected VM name:

Note: The Rapid VM Restore symbol appears beside the VM that was backed up, not beside the VM restored using Rapid VM Restore.
The Process Details dialog box shows Rapid VM Restore processes for the VM. If the VM is restored more than once concurrently using Rapid VM Restore, the protected VM name appears more than once in the VM Name list at the left of the dialog box.
-
If the protected VM name appears more than once in the VM Name list, check that the process ID for the VM that you want to migrate (recorded in Restore a Hyper-V VM within minutes using Rapid VM Restore) is shown in the middle of the dialog box. If the correct process ID is not shown, click another VM name in the VM Name list.
-
Click Migrate VM.
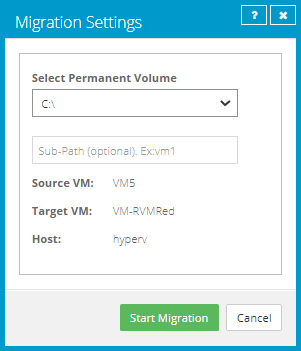
The Migration Settings dialog box appears. If you specified a Sub-Path when starting the Rapid VM Restore, this location is populated in the dialog box.
-
In the Select Permanent Volume list, select the permanent storage volume for the VM files.
-
(Optional) In the Sub-Path box, type the folder path (e.g., RestoredVMs\VM 1) on the selected volume for permanently storing VM files. If you do not specify a path, files will be saved in a folder with the restored VM's name on the selected volume.
-
Click Start Migration.
The following Status message appears in the Process Details dialog box: VM migration is in progress.
If you click Cancel Migration while the migration is in progress, the restored VM remains in the Hyper-V environment and is still dependent on the Hyper-V agent and vault. You can start the migration again, if desired.
When the VM is migrated to the permanent storage location, the following Status message appears in the Process Details dialog box: VM has been migrated. At this point, the VM is permanently restored and is no longer dependent on the Hyper-V agent and vault. The Rapid VM Restore process ends and the Rapid VM Restore symbol no longer appears beside the protected VM name on the Computers page.