Restore a Linux system from a BMR backup
-
An .iso file for starting the destination system and running the restore. The .iso file is created on the source system during a BMR backup and is backed up to the vault
-
A backup in the vault of all folders and files that are required for the system. By default, a Linux BMR backup includes all folders and files from the root (/), although some files can be excluded.
When restoring a Linux server from a BMR backup, the destination machine must have:
-
At least 4 GB of RAM.
-
The same boot type (BIOS or UEFI) as the source system, and compatible hardware.
-
Hard drives that are the same size or larger than drives on the source system.
-
A connection to the network, so that it can communicate with the vault.
Note: Restores are not supported to systems with different types of firmware.
To restore a Linux system from a BMR backup:
-
Do one of the following:
- If the source system is still available, copy the /Bare_Metal_Restore_Image.iso file from the root directory (/) of the source system to another machine.
- Use the Restore from another computer procedure to restore the /Bare_Metal_Restore_Image.iso file from the Linux BMR backup to another machine. See Restore data from another computer.
- Create a bootable USB device, CD or DVD from the Bare_Metal_Restore_Image.iso file and mount it on the destination system.
-
Boot the destination system from the bootable file.
-
Do one of the following:
-
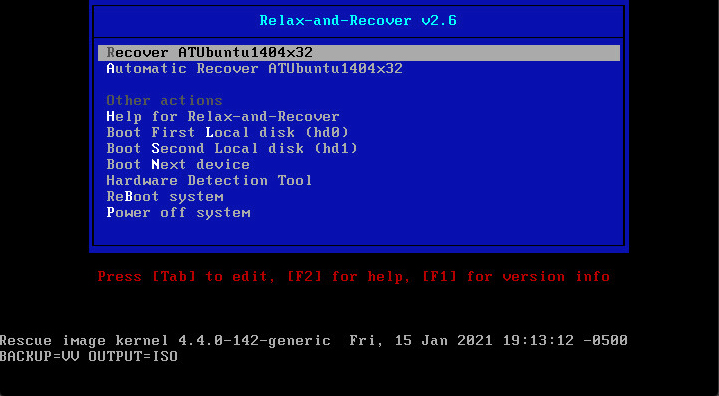
If the Relax-and-Recover screen appears, select Recover sourceSystemName and then press Enter. This screen appears if the protected system is BIOS-based.
Do not select the Automatic Recover sourceSystemName option or the system will not start successfully.
-
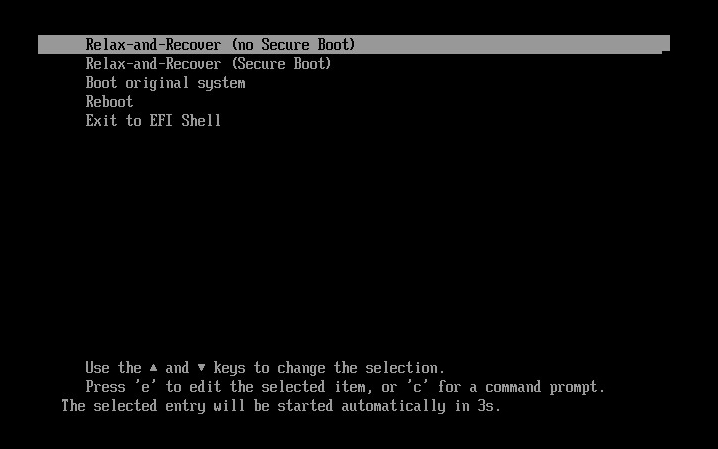
If the following screen appears, select Relax-and-Recover (no Secure Boot) and then press Enter. This screen appears if the protected system is UEFI-based.
-
-
At the login prompt, log in as root.
Note: If a login prompt does not appear initially, press Enter.

-
(Optional) To ensure that the connection to the vault is active, ping the vault IP address. If there are network connection issues, change the network settings.
-
Enter the following command:
./bmragent
-
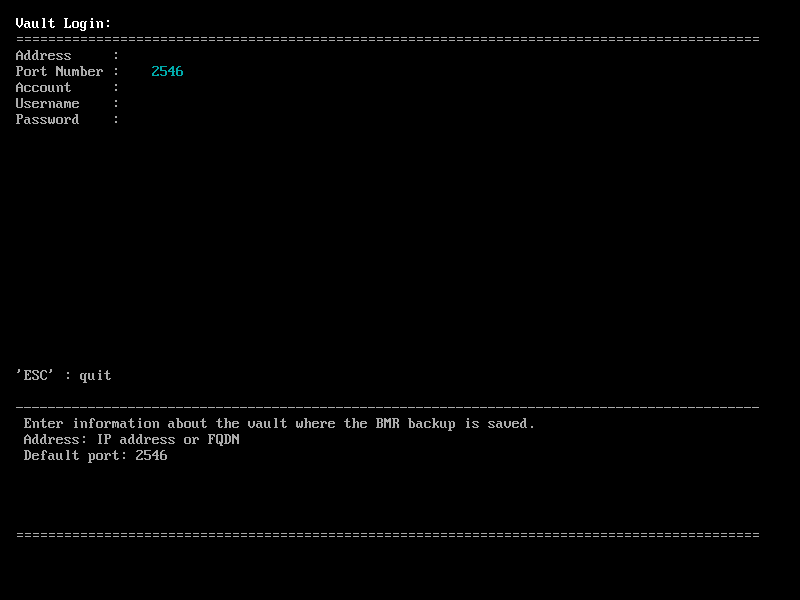
On the Vault Login screen, enter information for connecting to the vault where the BMR backup is saved.
In the Address field, enter the vault IP address or fully qualified domain name (FQDN). In the Port field, enter the port number for connecting to the vault (2546, by default). In the Account, Username and Password fields, enter an account and credentials used for the backup.
-
On the Protected Servers screen, press the up and down arrow keys to select the protected server to restore, and then press Enter.
-
On the Job List screen, press the up and down arrow keys to select the BMR job to restore, and then press Enter.
-
On the Safeset List screen, press the up and down arrow keys to select the backup to restore, and then press Enter.
-
On the Start Restore screen, enter the encryption password for the BMR backup job.
On the CONFIRM line, press the right arrow key to choose yes, and then press Enter.
-
If the destination system is larger than the protected system, a Confirm the recreated disk layout or go back one step prompt appears. Press Enter to select the default option.
If an error occurs at this stage, please go to http://relax-and-recover.org/support/ for Relax-and-Recover support.
-
If the destination system has a larger disk than the protected system, a Confirm restored config files are OK or adapt them as needed prompt appears. Press Enter, and then press Enter again to select the default options.
The system restore begins. The restore time depends on the size of the backup.
If the restore takes a long time, the screen might go blank. To refresh it, press Enter.
When the restore is finished, a Completed the bare metal restore message appears, followed by the RESCUE prompt.

-
Run the following command to view the restore log:
./xlogcat jobName/RSTyyyymmdd-hhmmss.XLOG | tail -n 25
Where jobName is the name of the BMR job from which you restored the system, and yyyymmdd-hhmmss is the date and time of the restore.
Review the restore log. Check that the restore completed with no errors and that the restored system size is correct
-
Restart the system.
Depending on the source system platform and configuration, the system could restart once or twice automatically.
-
Log in to the restored system with credentials from the protected system, and verify that the system is working.